PDF is a file format that preserves document formatting much better than others, especially when it is viewed online or printed. This advantage enables file sharing without losing any layout. On the other hand, an Excel spreadsheet could be lost it's layout during internet transferring or when you open it on a different program. So we'd better convert the format before sharing.
In this post, we've summarized four different solutions of how to save or convert an Excel file to PDF format. You can use online Excel to PDF converter EasePDF, Microsoft Office, and PDFelement as you like. You are about to find out that Excel to PDF conversion is as easy as you can imagine.
Contents
Part 1. How to Convert Excel to PDF Online for Free
Part 2. Convert Excel to PDF in Office 2007 and above
Part 1. How to Convert Excel to PDF Online for Free
The most recommended solution for converting Excel or other formats to PDF is to use a free online converter like EasePDF. Compare to other conversions, online converting is cross-platform supported. No matter you're a Mac user, Windows user, or a smartphone user, you can always change an Excel file to PDF in seconds online, without any downloading and installation.
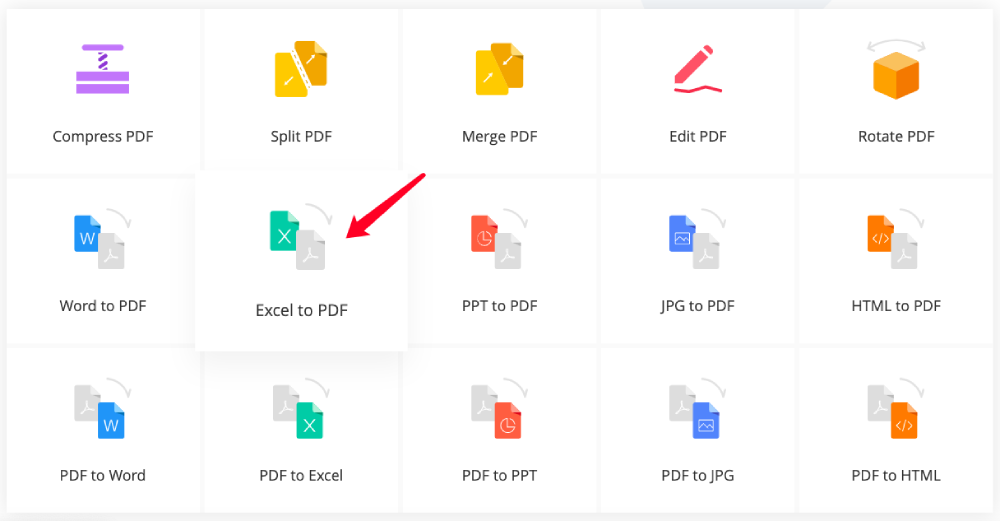
Step1. Choose "Excel to PDF" converter on EasePDF homepage
Step 2. Upload your Excel file to the server
Click the "Add File(s)" button to upload the Excel spreadsheet you want to convert or simply drag and drop your file from your device to the dropping area. EasePDF also supports adding files from cloud storage like Google Drive, Dropbox or others.

Step 3. Convert Excel to PDF
When your file is uploading, the online converter will convert it to PDF immediately.

Step 4. Download the converted PDF
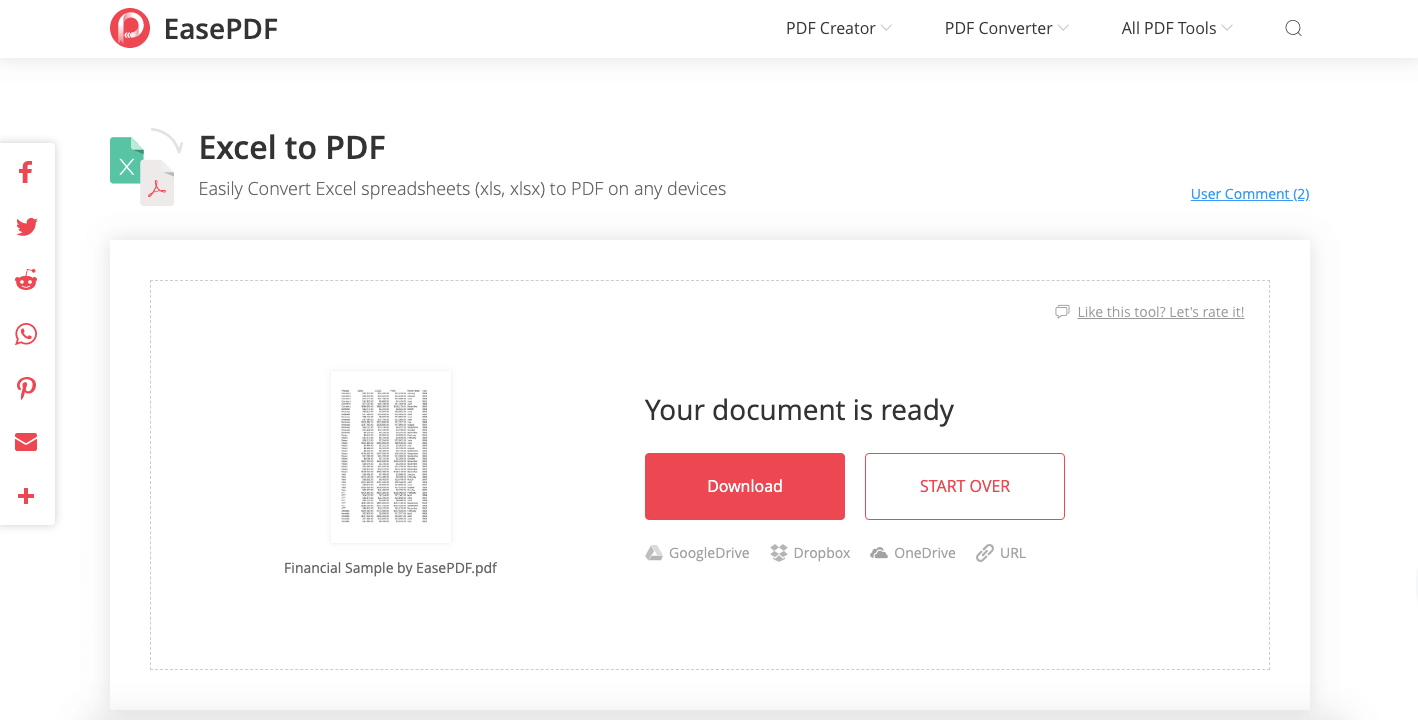
When your PDF is successfully created, the converter will show you a download link. Click the "Download" button to save the PDF document to your local device. Or you can choose to save it to your Google Drive, Dropbox or other cloud drives by clicking on the URL link below the download area. And if you have more Excel sheets to be converted, just click "START OVER" to start another task.
EasePDF supports batch conversion for free, so you can also upload multiple files at the same time. The server will convert them in bulk and pack the converted PDFs as a compressed zip file. Normally EasePDF converts an Excel to a PDF at normal size. But if your original Excel files contain lots of graphs that take a lot of room, the converted PDF file could be huge sometimes. In that case, you need to compress the converted PDF to reduce the size.
If the original Excel sheet contains confidential data that need more privacy, you might concern if they'll be leased out for commercial usage. Don't worry, you can always add a password to your converted PDF file to protect your data from being stolen.
Part 2. Convert Excel to PDF in Office 2007 and above for Windows
If you are a Windows user and already have Microsoft Office installed on your computer, you can create a PDF from an Excel file using Office directly, no need to download another software. There is a slight difference between Office 2007 and Office 2010 or above in terms of converting. Now we'll take Office 2007 and 2-10 for example and show you three ways to convert Excel to PDF in Office. First of all, you need to open your Excel file with Office, then do as the following steps.
Option 1. Use "Save As" Option in Office 2007 (or above)
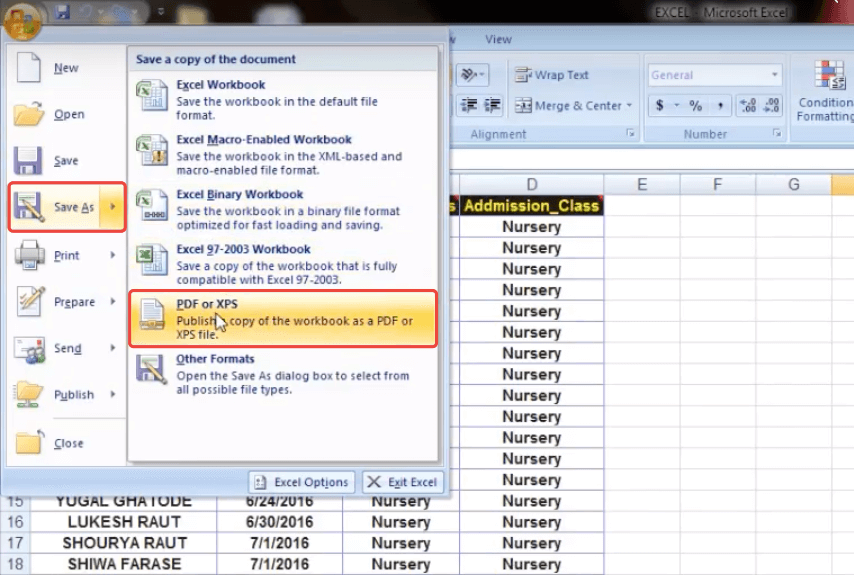
Step 1. On the main menu, click "Save As", and choose "PDF or XPS".
Step 2. Publish Excel as PDF
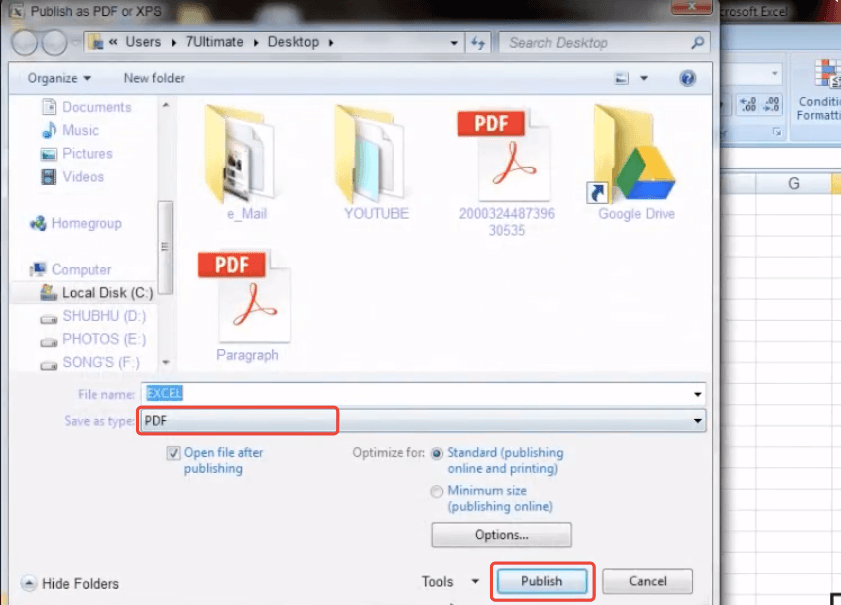
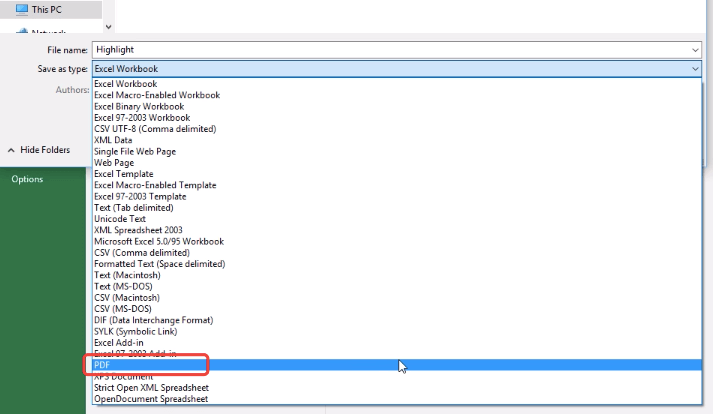
On the newly opened window, choose a destination to store your converted PDF. Type a name for your new file on the "File name" box. Choose "PDF" on the "Save as type" menu. If you want to check the converted file immediately after the conversion, tick the "Open file after publishing" box. You can set the optimization and other options as you want. When everything is set up, click the "Publish" button and you'll get a newly created PDF document on the location you choose.
Note: In Office 2010, there's a bit different. On the "Save As" file type options, click "More options".

PDF is included in the drop-down file type list, you can just click on it.
Option 2. Use "Print" Option in Office 2007 (or above)
Step 1. Click the "File" menu and select "Print". You'll see your Excel spreadsheet is displayed on the right interface. On the left area, choose "Microsoft Print to PDF Ready" as the printer.
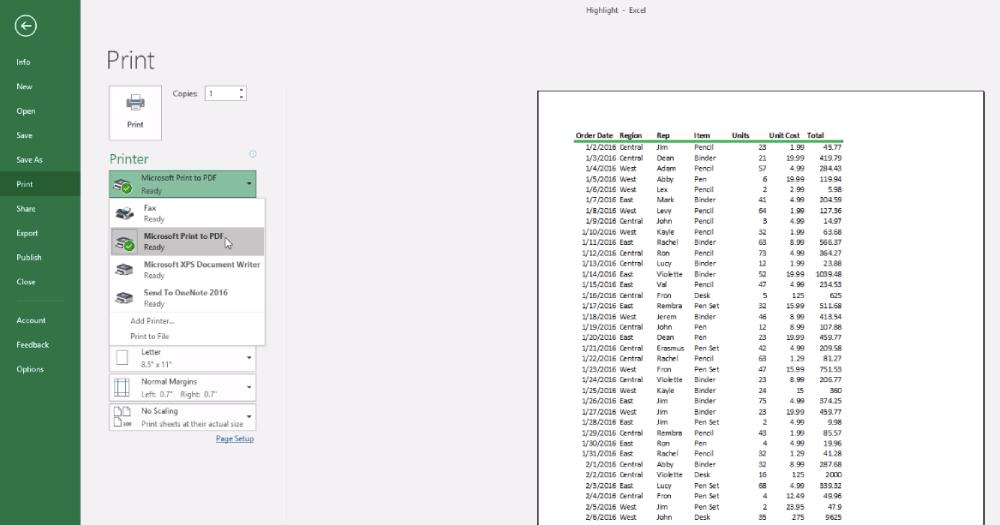
Step 2. You can change some settings if you need to. Once everything looks fine to you, click the "Print" icon above the printer.
Step 3. A "Save Print Output As" window will pop up, enter the file name and choose a destination to save the converted PDF. At the "Save as type" area, make sure it's "PDF Document". When you finish all the settings, click the "Save" button.
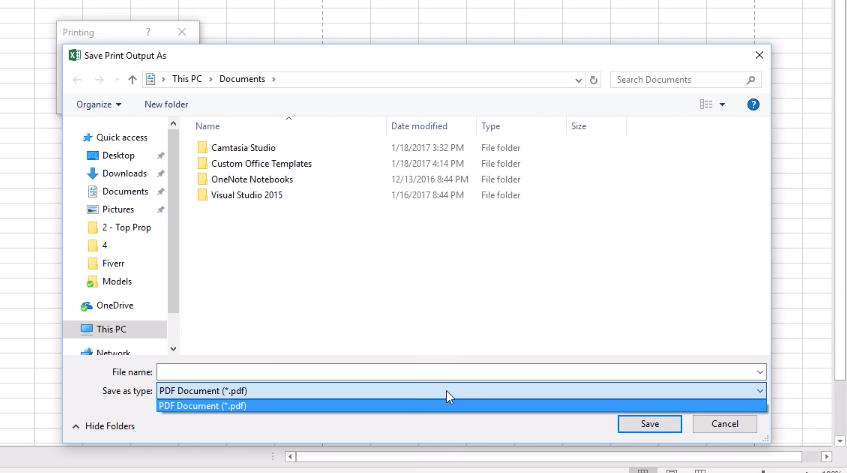
Now your Excel file has been converted to a PDF document. Open your new PDF and see if it looks perfect. Before you hit the save to PDF button, you can go for a preview and see if it prints to PDF correctly.
You can check on "Page Break Preview" to see if you need to readjust the size of the table.
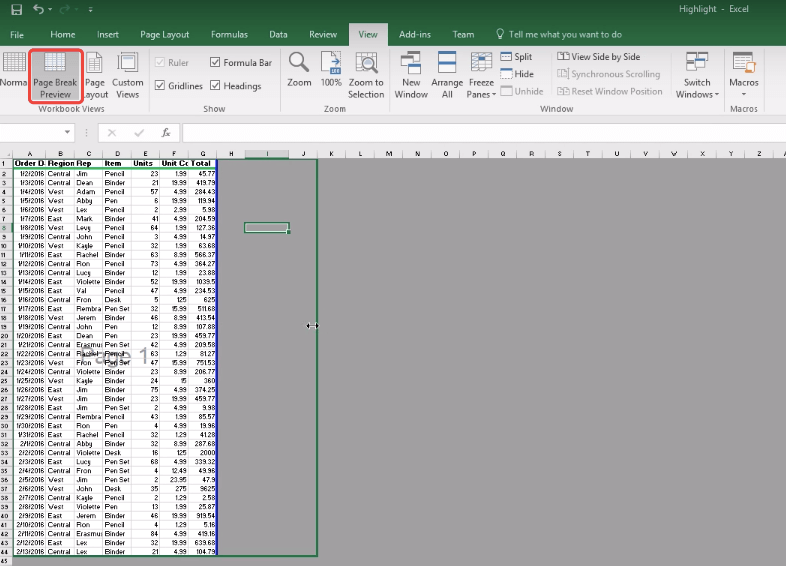
Or you can go to the "Page Layout" to add some headers and footers if you want.

Option 3. Use "Export" Option in Office 2010 (or above)
Step 1. Go to the "File" tab on the top menu, click "Export" from the drop-down options. Now choose "Create PDF/XPS".
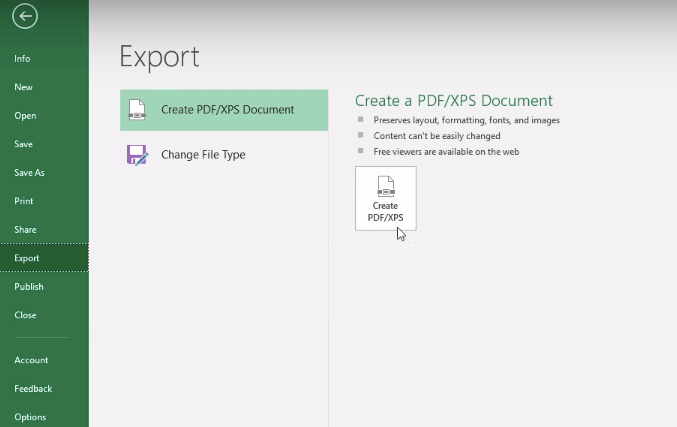
Step 2. The office will open a new window for you to choose a storage location for your PDF. Name your file and remember to select "PDF" but not "XPS Document" as your "Save as" type. When you finish all the settings, click "Publish" to start converting your Excel spreadsheet to PDF.

Note: Converting Excel to PDF with Microsoft Office is also work for Mac users, as long as you have installed Office on your Mac computer.
Part 3. How to Convert Excel to PDF on Mac
If you don't have an Office program on your Mac computer, you can use EasePDF Excel to PDF Converter or PDFelement as an alternative. Since we have introduced how to work with EasePDF in part 1, now we'll show you step by step about PDFelement conversion. First of all, you need to download and install PDFelement to your computer.
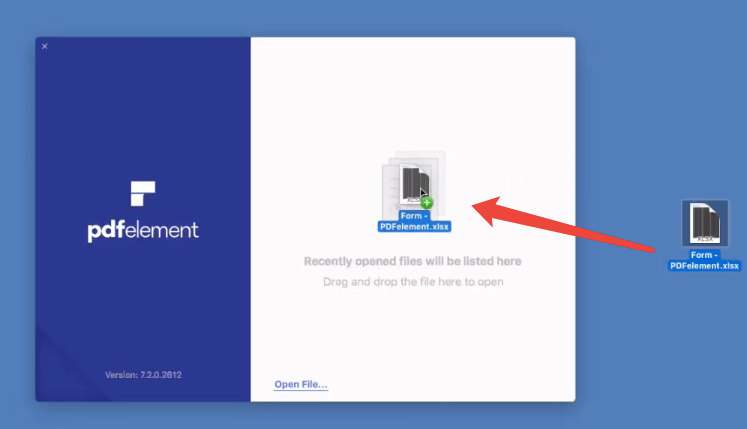
Step 1. Open your Excel with PDFelement
Run the software after the installation. There are two ways to open an Excel file. One way is to drag the Excel document to the start-up menu. The other way is to navigate to the "File" menu and select "PDF from File" under the "Create" tab.
Step 2. Save Excel As PDF
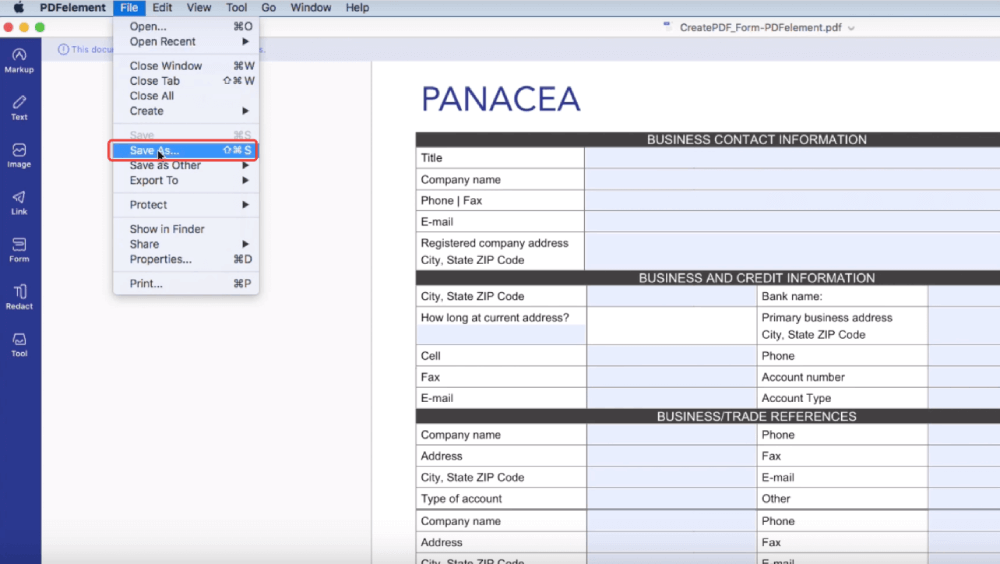
First of all, please check if the layout and the format are well. If you're satisfied with the layout, head to the "File" menu and choose "Save As". Then select a saving location with the pop-up window, and click "Save". When the process is done, you'll see your Excel document has been successfully converted to PDF file.
Part 4. How to Export Excel to PDF on iPhone or Android
What if the Excel document we need to convert is on our cell phone? That's easy. The first two solutions on this post also work for smartphones. That means you can convert Excel to PDF on your iPhone or Android phone online using EasePDF, or using Microsoft Office if you have this app on your phone. And if you don't like these two ways, you can try another free app WPS.
Step 1. Go to Apple's app store or Google Play, download and install WPS to your phone.
Step 2. Open Excel file in WPS. Select the Excel you want to convert on your phone's storage files and open it.
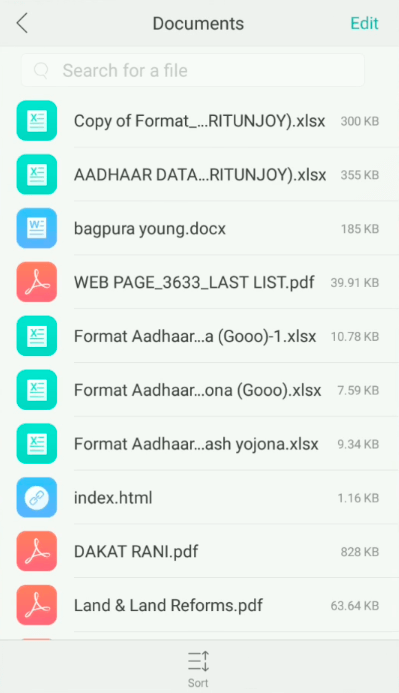
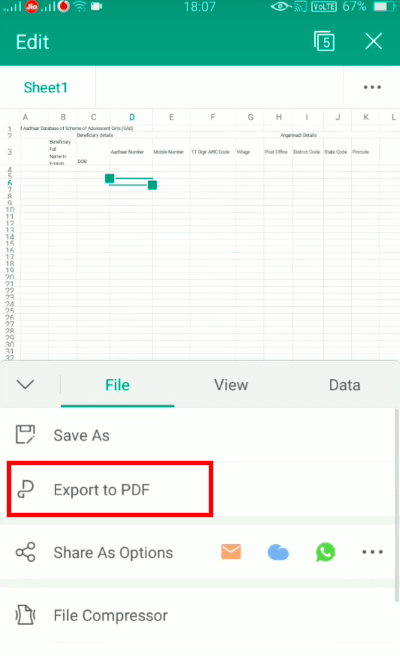
Step 3. On the bottom of the WPS interface, click "Tools". On the "File" section, choose "Export to PDF".
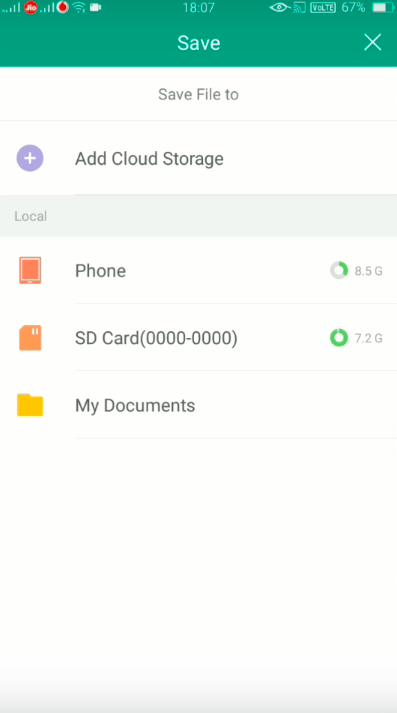
Step 4. Choose a saving location on your phone or SD card. Or you can add it to cloud storage.
And now you've completed the conversion. Go check it.
If you find this article helpful, please don't forget to hit the "Like" button or subscribe to our latest posts. And please always feel free to leave a comment if you have any thoughts related to PDF to share with us.
Was this article helpful?
YES Or NO


Comment
Be the first one to leave a comment?
Hey, this resource doesn't have any comments yet. Would you want to share your comment now?
please enter comments
please enter your name
please enter the correct email address
Thanks for your feedback
We sincerely thanks for your comments and they are really helpful for us. If you like EasePDF, share it with your friends.
Share